
Data Upload
To upload data from you instrument PC to the LOGS server we reccomend using the LOGS-Bridge. LOGS-Bridge allows you to seamlessly integrate your instrument data into LOGS – fully automated without complex networking and firewall configurations. For old instrument PC with outdated operating systems you can use a SSH server. You also manually upload data by using the Manual Upload process on the dataset table.
Before you can connect an instrument PC to your LOGS server you have to prepare some configurations for the measuring method and instrument you are using.
Connect Instrument PC via LOGS-Bridge
The Bridge Client is designed to push data from your instruments to LOGS-SDMS. You can download the LOGS-Bridge Client from within LOGS-SDMS, under More:Tools:Data Sources:+ Add Bridge.
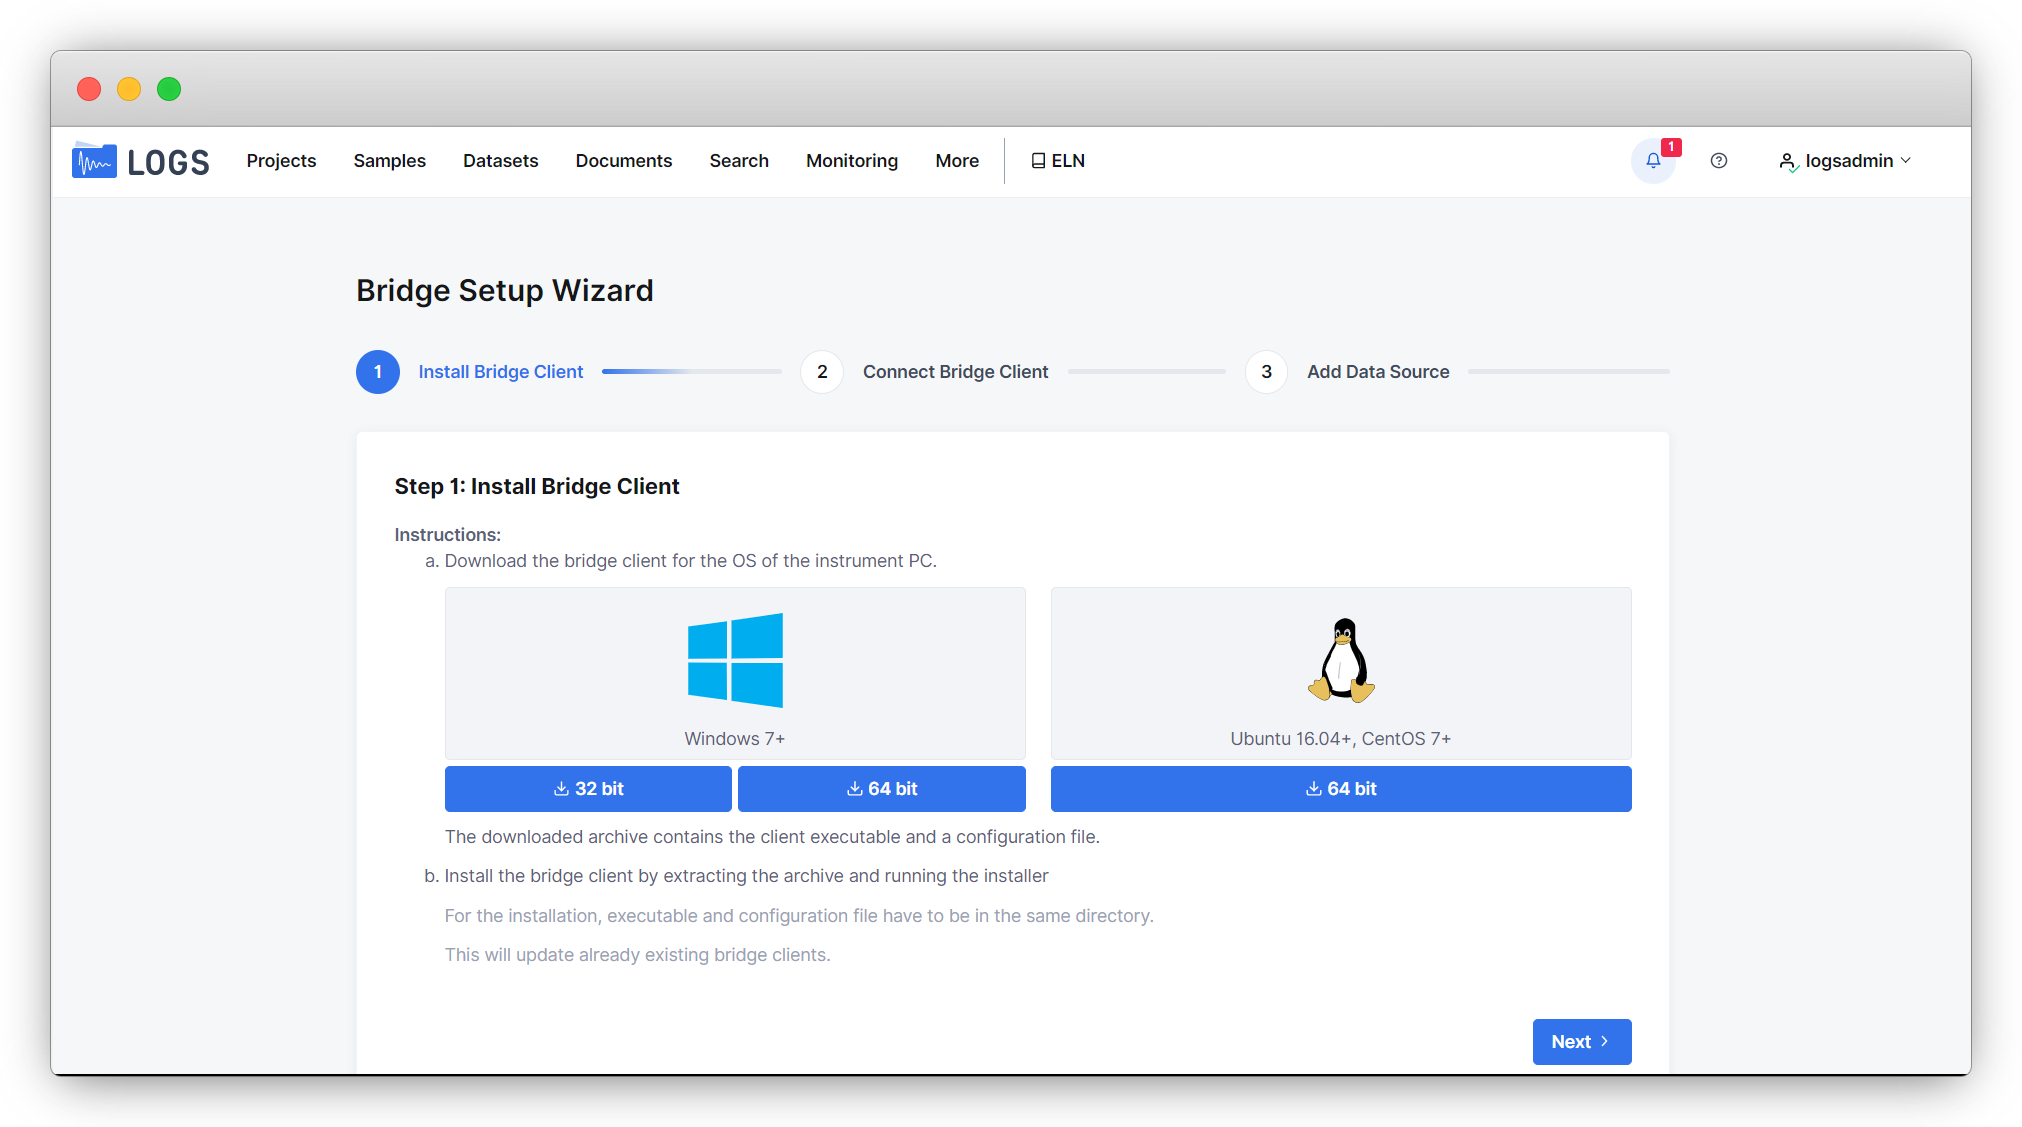
Download the bridge client for the OS of the instrument PC. The downloaded archive contains the client executable and a configuration file.
Install the bridge client by extracting the archive and running the installer
For the installation, executable and configuration file have to be in the same directory.
This will update already existing bridge clients.
The LOGS-Bridge Client ist designed for Windows 7+, Ubuntu 16.04+ and CentOS 7+.
Connect Instrument PC via SSH
SSH server for Windows
We recommend using the OpenSSH server from the Cygwin environment in order to run an SSH server on Microsoft Windows.
tested on 2021-05-05 with Windows 10 20H2 and Cygwin 3.2.0
Installation
download the cygwin installer at https://www.cygwin.com/
start the downloaded installer, usually setup-x86_64.exe
select install from internet
leave the root directory on default and install for all users
leave the local package directory on default
use the preselected use system proxy settings
select any of the available download sites
select the newest version of the packet openssh in the category net
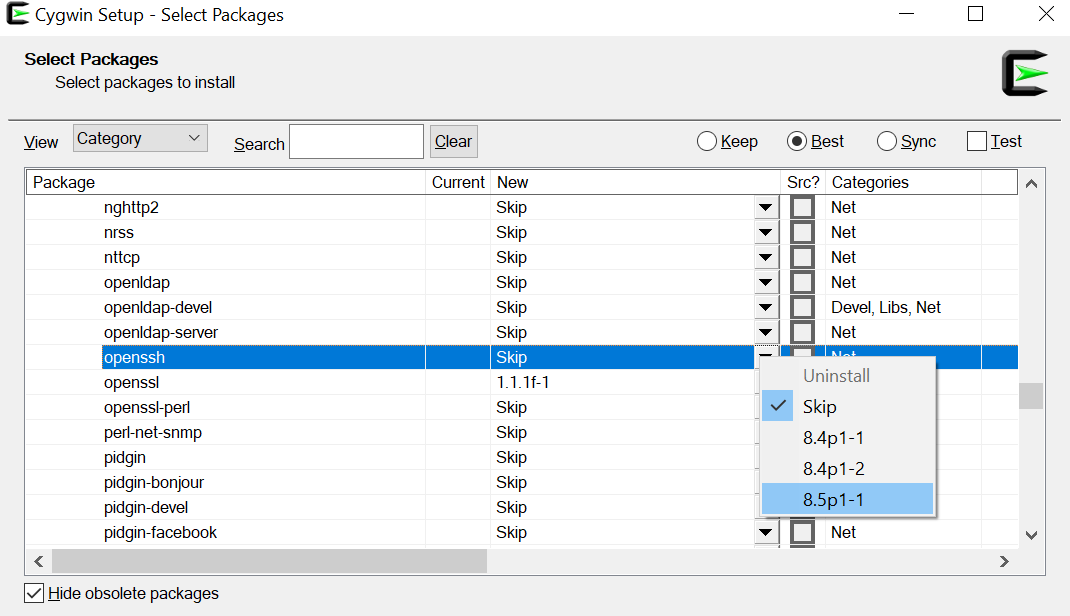
Cygwin Setup
review and confirm changes - it will install the default packages plus openssh and its dependencies
wait for download and installation to finish
select if you want to create icons on the desktop and in the start menu and complete the installation
Configuration of OpenSSH
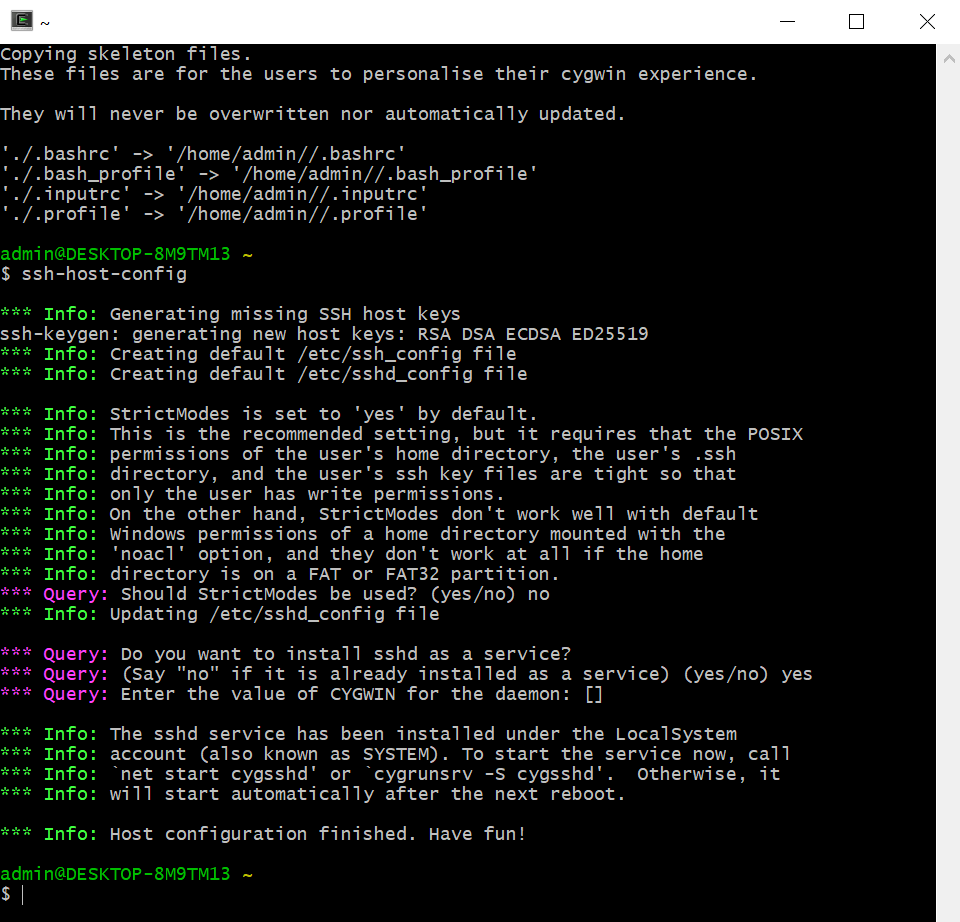
start the Cygwin64 Terminal, running it as administrator
run the command ssh-host-config
enter these options:
strict mode: no
install as service: yes
value of cygwin: leave this empty!
start the SSH server with net start cygsshd - it will start automatically after the next reboot
The SSH server can be monitored and restarted in the services section of the control panel where it is listed as CYGWIN cygsshd.
All windows users can log in to the SSH server using the same username and password they use for Windows.
A password has to be set, empty passwords don’t not work!
Configuration of the Windows firewall
create a rule allowing incoming SSH connections in the Windows Firewall:
start the Windows Defender firewall with advanced security
select outgoing rules
select new rule
create a rule for a port
select the protocol TCP and select 22 as local port

select allow connection
check all boxes to allow this connection on all types of networks (domain, private, public)
give a name to this rule, e.g. openssh
Manual Data Upload
In general, datasets are uploaded automatically in LOGS directly from the instruments, but there are several reasons why a manual upload is needed. For example uploading datasets from instruments that are not connected to LOGS or re-uploading processed datasets. In this case LOGS recognizes this dataset as known and replaces the old dataset by the newly uploaded one (see Update a dataset). To manually upload a dataset:
go to the datasets page and click Upload Datasets
Drag & Drop or select the dataset (single file or folder) manually
Select the correct data format (LOGS automatically determine the correct format if possible)
Select Method, Instrument
Optionally add additional Metadata such as Projects, Operators etc.
Upload
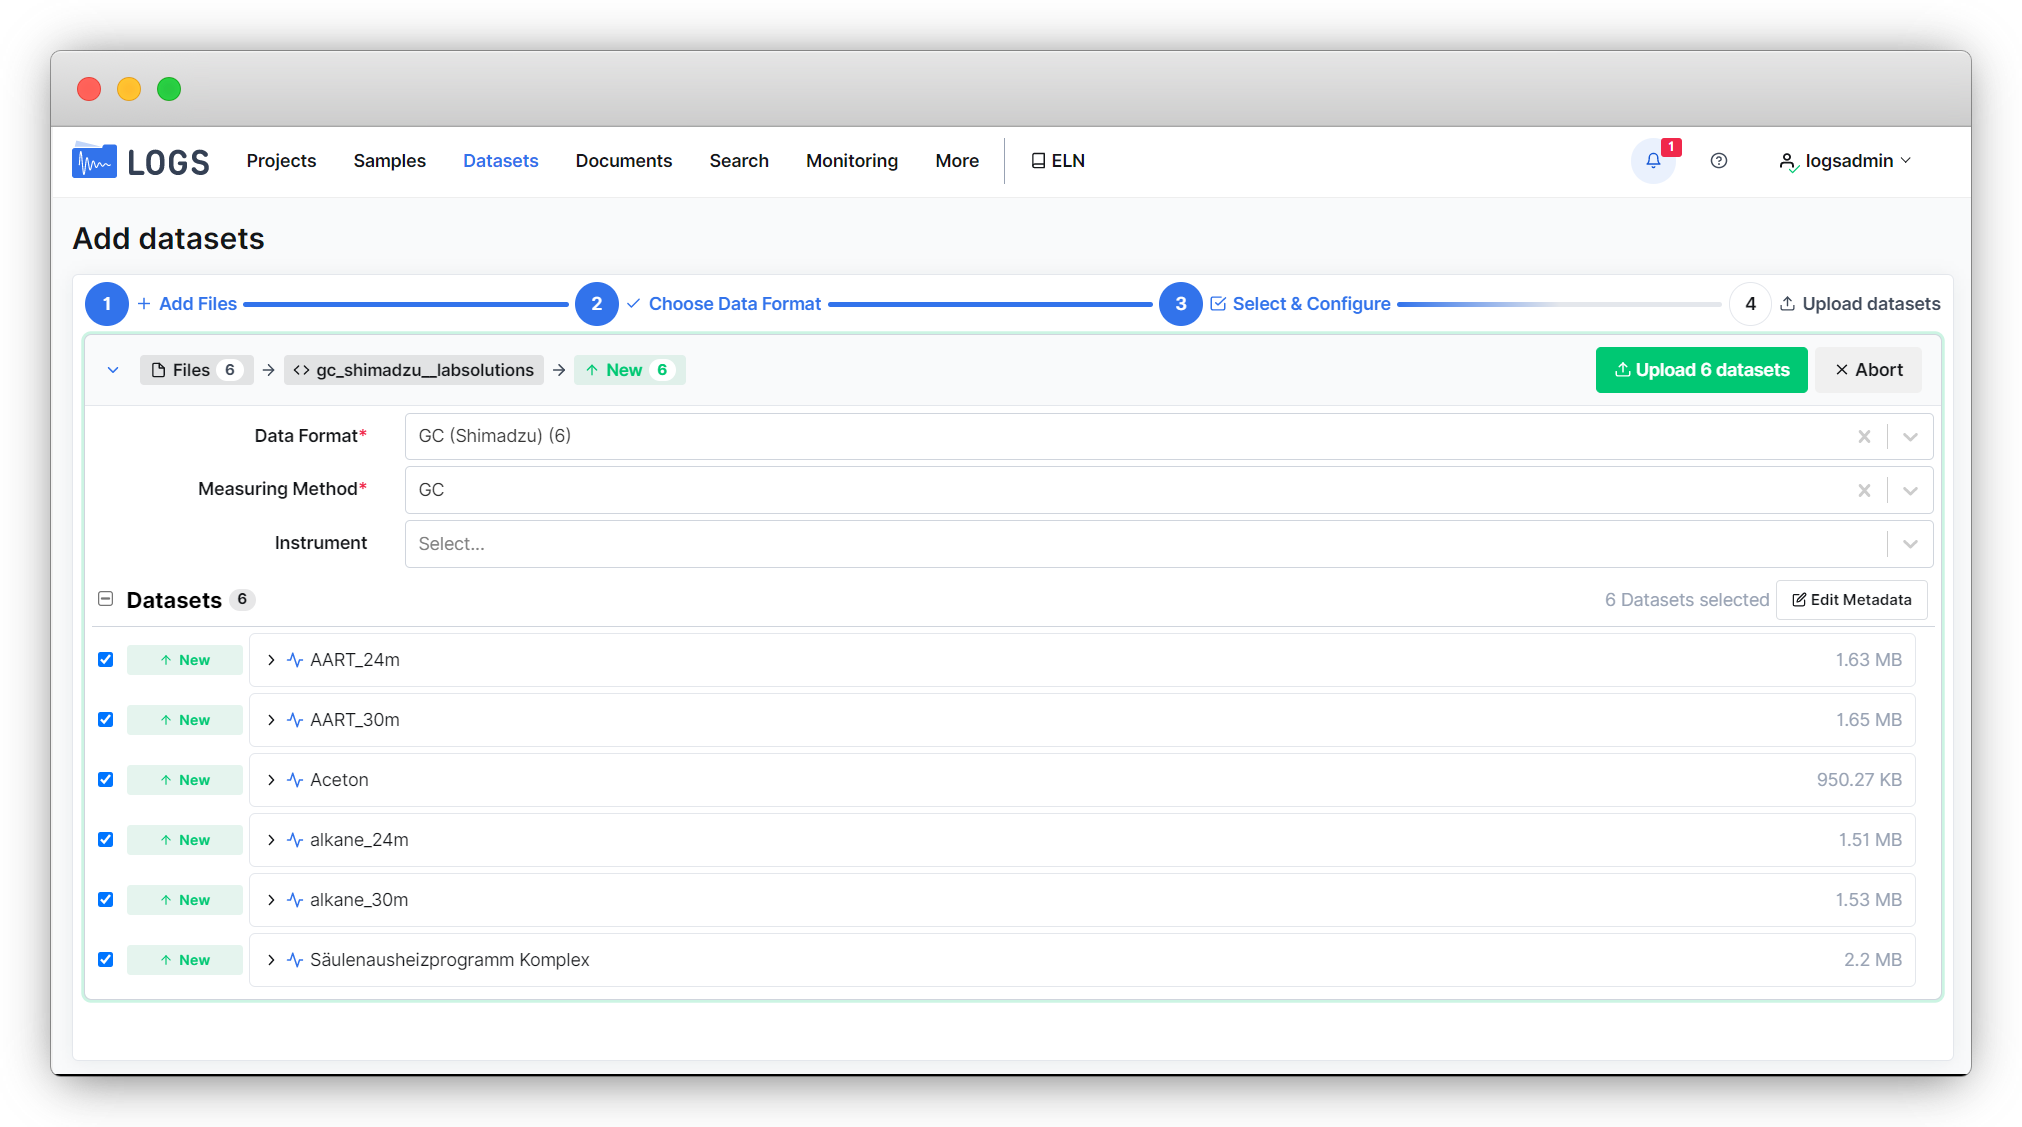
If one dataset consists of more than one file, please use the original folder structure of the instrument. You can of course also upload several datasets at a time. You will get a list of all datasets that you can upload and choose between Upload X datasets or upload a specific dataset from the list. Depending on the size of the datasets the upload process will take some time.
When the upload is finished you will get a green message “Dataset uploaded successfully” below the dataset list. By clicking on View you will be redirected to the uploaded dataset detail page.
When the upload fails you will get a red message “Unrecognized data format”. Please contact the support or use our New Data Format Request Form.
Update datasets
Datasets in LOGS can be updated by manually uploading a dataset. This is possible if the dataset contains immutable acquisition data and mutable processing data like for e. g. Bruker NMR data. This can be different for every data format. Please contact us at support@logs-repository.com for more information about updating data format.
Custom import configuration
In addition to the manual editing process LOGS offers different options to automatically add metadata to your datasets. Information of the datasets itself or from the folder path where it was stored can be used. Therefore we can prepare custom import configurations for you. You can find some examples here Custom Import Configurations.
Please contact us for further information: support@logs-repository.com.